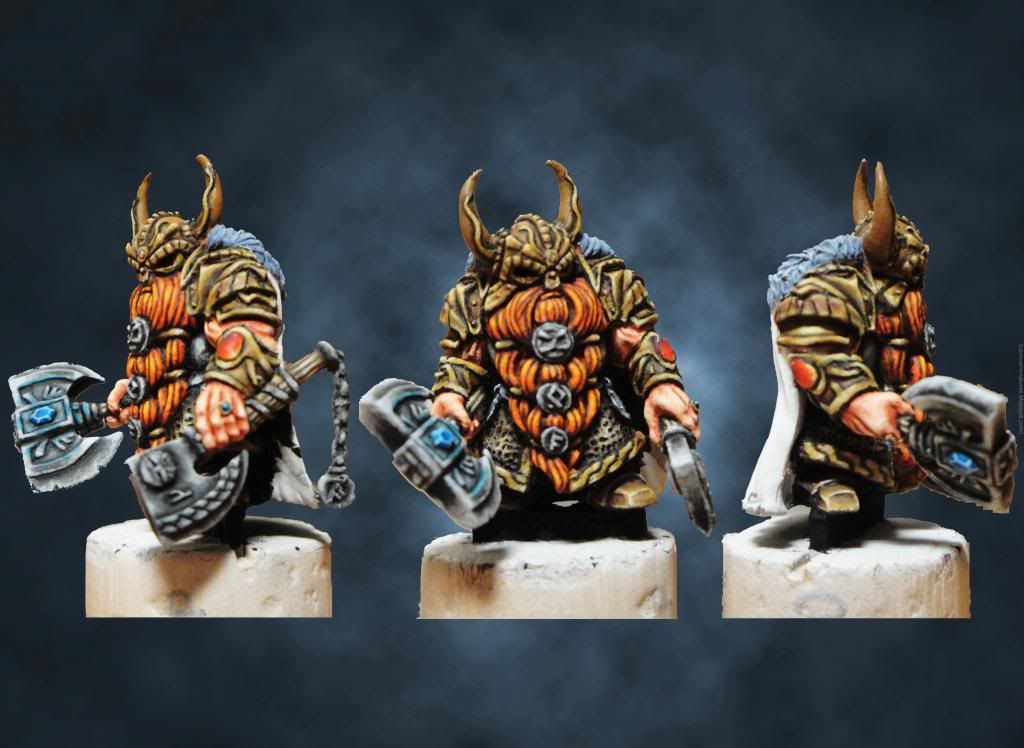
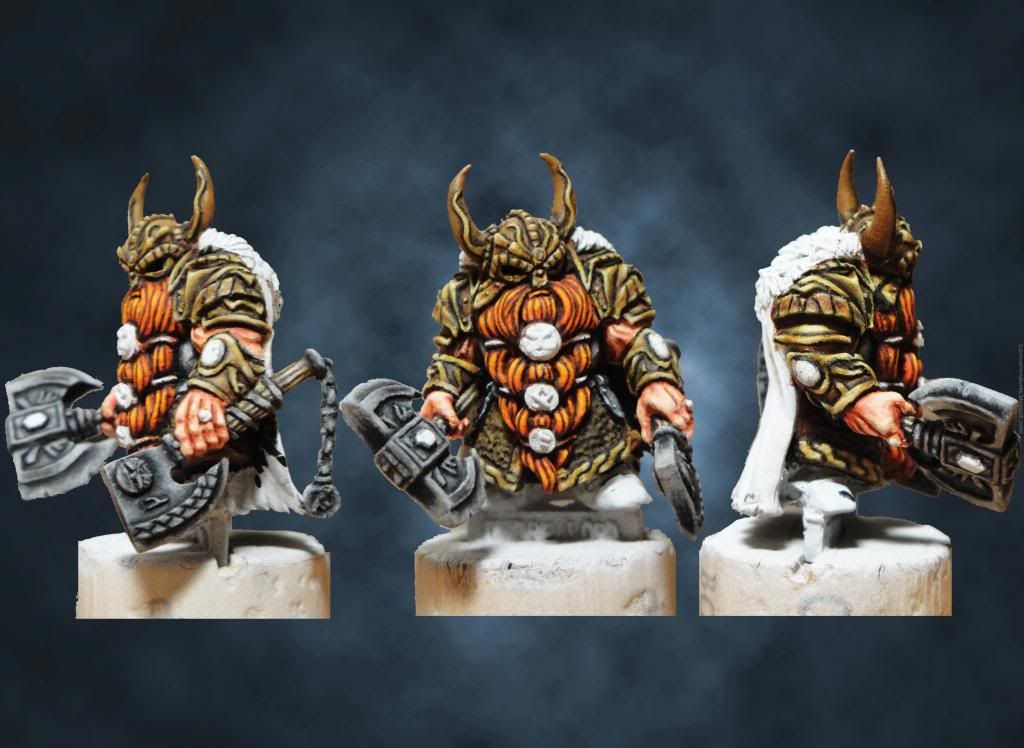
Más avances para el Señor Berserker: pelo y faldones delantero y trasero.
More advances for the Berserker Lord: hair and coat-tail front & rear:
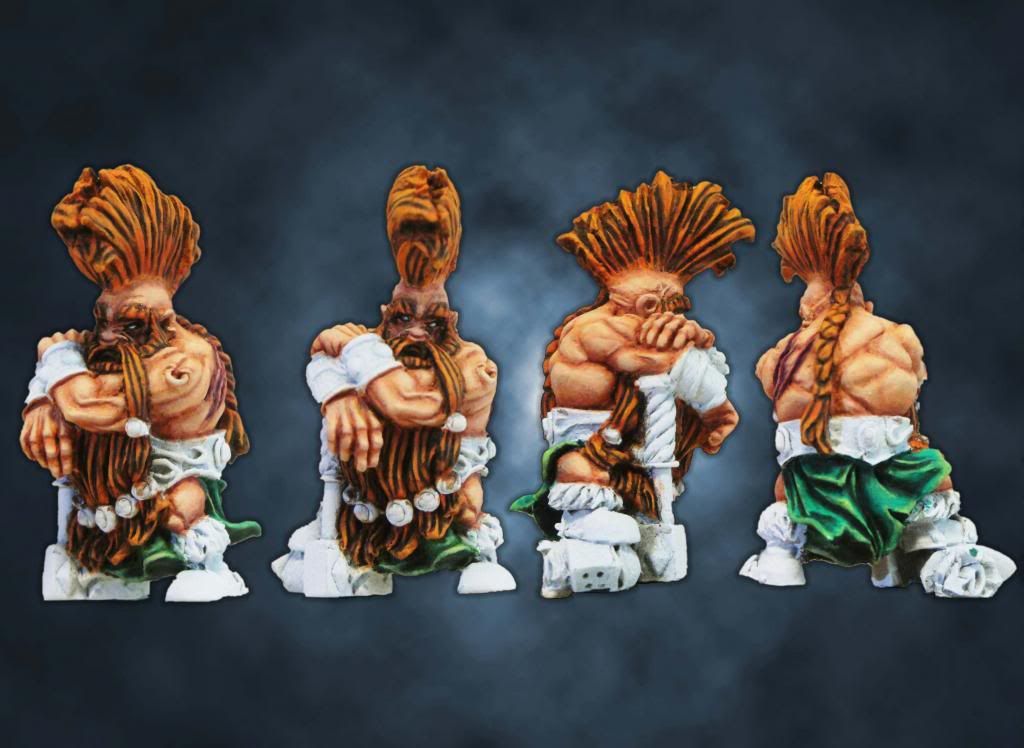
Colores para el Pelo Berserker:
Colours for the Berserker Hair:
Capa Base: Naranja Tostado
Sombras 1: Marrón Bichos
Luces 1: Naranja Fuego
Sombras 2: Marrón Carbonizado
Luces 2: Amarillo Solar
Basecoat: Hot Orange
Shadows 1: Beasty Brown
Lights 1: Orange Fire
Shadows 2: Charred Brown
Lights 2: Gold Yellow
Colores para el Faldón Delantero
Colours for the Front Coat-tail:
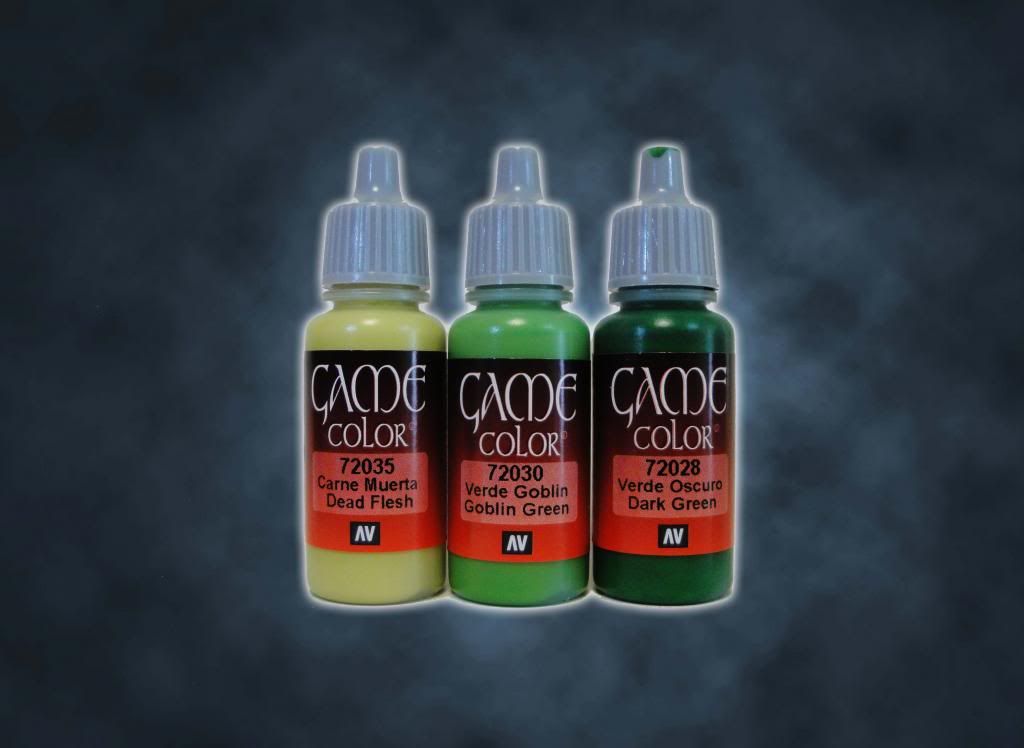
Capa Base: Verde Goblin
Sombras 1: Verde Goblin + Verde Oscuro
Luces 1: Verde Goblin + Carne Muerta
Sombras 2: Verde Oscuro
Luces 2: Carne Muerta
Basecoat: Goblin Green
Shadows 1: Goblin Green + Dark Green
Lights 1: Goblin Green + Dead Flesh
Shadows 2: Dark Green
Lights 2: Dead Flesh
Lights 3: Ghost Grey
Colores para el Faldón Trasero:
Colours fot the Rear Coat-tail:
Capa Base: Verde Jade
Sombras 1: Verde Jade + Verde Casposo
Luces 1: Verde Jade + Verde Bilis
Sombras 2: Verde Casposo
Luces 2: Verde Bilis
Basecoat: Jade Green
Shadows 1: Jade Green + Scurvy Green
Lights 1: Jade Green + Livery Green
Shadows 2: Scurvy Green
Lights 2: Livery Green
sábado, 12 de abril de 2014
WIP Señor Berserker / Berserker Lord 1/4
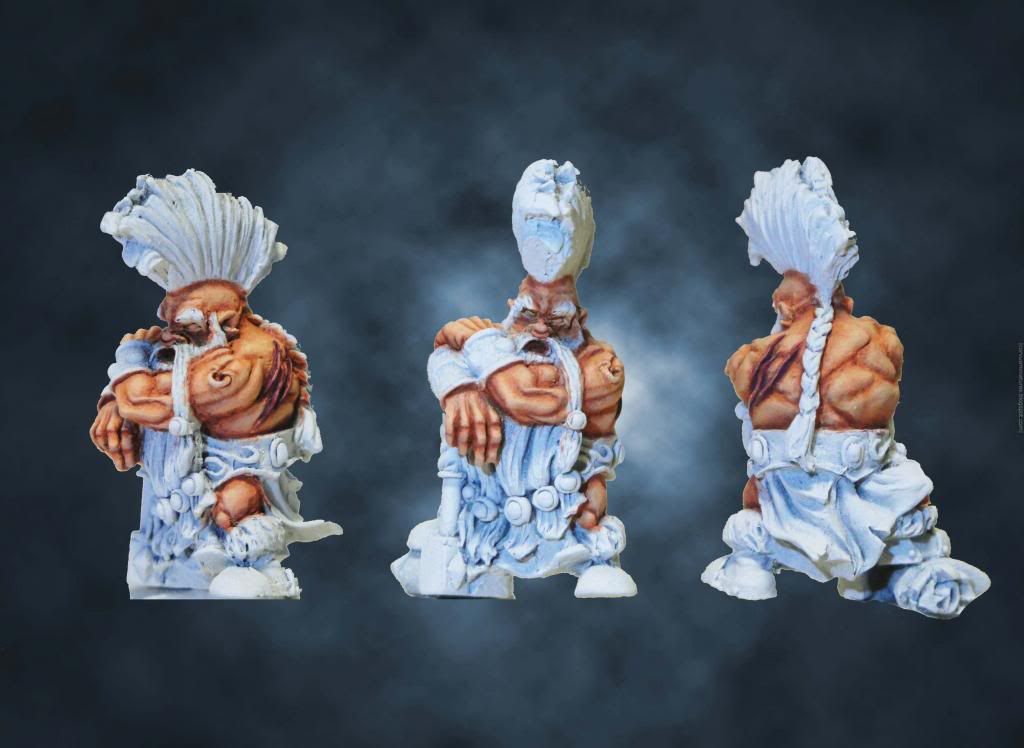
Ahora toca el turno del Señor Berserker, de la marca española Avatars of War. No os dejéis engañar por su pose calmada. Este señor siempre está preparado para la batalla!!
Empezamos con la carne y las heridas de guerra:
Now it's the turn of the Berserker Lord, from the spanish company Avatars of War. Don't be deceived by his quite pose. This Lord is always prepared for the battle!!
We begin with the skin and the war wounds:
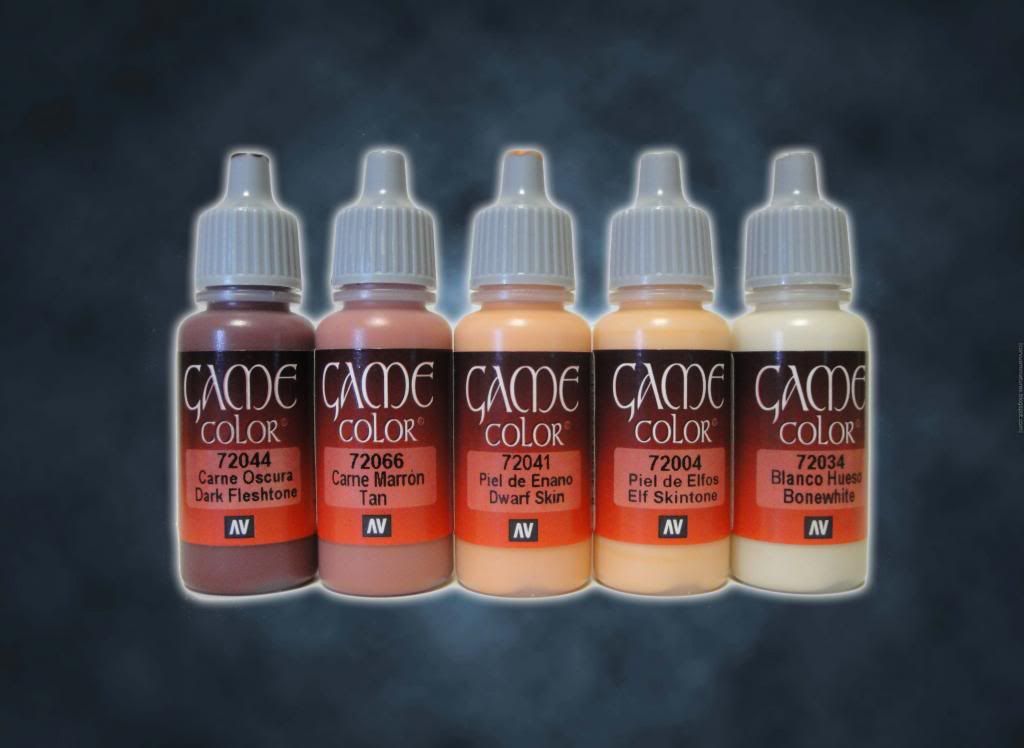
Colores para la Carne Enana:
Colours for the Dwarf Skin:
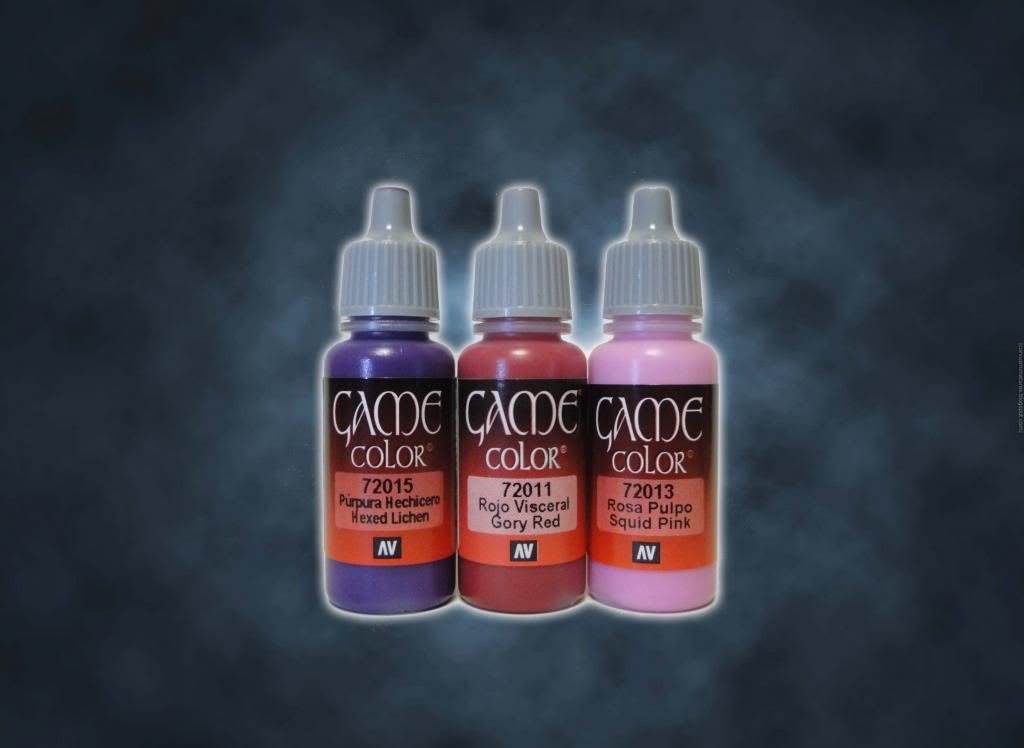
Colores para las Cicatrices:
Colours for the Scars:
Hay muchas formas de pintar las heridas de guerra. Pueden ser simples rasguños, heridas recientes aún abiertas o cicatrices del pasado. Me apunto estas notas para un futuro artículo centrado en este tipo de efectos ;). Por ahora, cicatrices cerradas pero recientes:
Empezamos con la carne y las heridas de guerra:
Now it's the turn of the Berserker Lord, from the spanish company Avatars of War. Don't be deceived by his quite pose. This Lord is always prepared for the battle!!
We begin with the skin and the war wounds:
Colores para la Carne Enana:
Colours for the Dwarf Skin:
Capa base: Piel de Enano
Sombras 1: Carne Marrón
Luces 1: Piel de Elfos
Sombras 1: Carne Marrón
Luces 1: Piel de Elfos
Sombras 2: Carne Oscura
Luces 2: Piel de Elfos+ Blanco Hueso
Luces 3: Blanco Hueso
Basecoat: Dwarf Skin
Shadows 1: Tan
Lights 1: Elf Skintone
Shadows 2: Dark Fleshtone
Lights 2: Elf Skintone + Bonewhite
Shadows 2: Dark Fleshtone
Lights 2: Elf Skintone + Bonewhite
Lights 3: Bonewhite
Colores para las Cicatrices:
Colours for the Scars:
Hay muchas formas de pintar las heridas de guerra. Pueden ser simples rasguños, heridas recientes aún abiertas o cicatrices del pasado. Me apunto estas notas para un futuro artículo centrado en este tipo de efectos ;). Por ahora, cicatrices cerradas pero recientes:
Capa base: Rojo Visceral (encima y alrededor de la cicatriz)
Sombras 1: Púrpura Hechicero (alrededor de la cicatriz)
Luces 1: Roja Pulpo (encima de la cicatriz)
Sombras 1: Púrpura Hechicero (alrededor de la cicatriz)
Luces 1: Roja Pulpo (encima de la cicatriz)
There're many ways to paint war wounds. They could be minor scratches, recent wounds still open or scars from the past. I write down these notes for a future article focused on these kind of effects ;). For now, recent closed scars:
Basecoat: Gory Red (on and around the scar)
Shadows 1: Hexed Lichen (around the scar)
Lights 1: Squid Pink (on the scar)
Shadows 1: Hexed Lichen (around the scar)
Lights 1: Squid Pink (on the scar)
WIP Señor Enano / Dwarf Lord [COMPLETE]
Con el objetivo de evitar perderse entre los diferentes post de WIP's y facilitar el compartir dicho contenido, escribiré un artículo final con el índice de contenido como el que os presento aquí. Espero que esto ayude a hacer el seguimiento del WIP :)
In order to avoid missing within multiple post WIPs and facilitate sharing it, I will write a final post with the index of contents as the one it's here. I hope this help tracking the WIP :)
WIP Señor Enano / Dwarf Lord 1/6
WIP Señor Enano / Dwarf Lord 2/6
WIP Señor Enano / Dwarf Lord 3/6
WIP Señor Enano / Dwarf Lord 4/6
WIP Señor Enano / Dwarf Lord 5/6
WIP Señor Enano / Dwarf Lord 6/6
sábado, 8 de marzo de 2014
WIP Señor Enano / Dwarf Lord 6/6
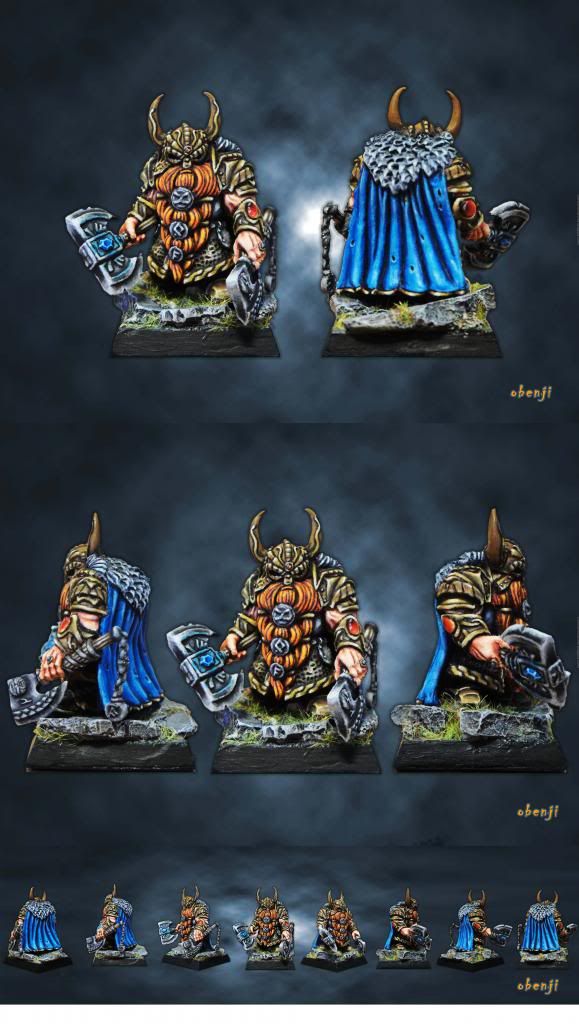
¡¡¡TERMINADO!!!
Aquí os muestro las imágenes finales del Señor Enano de Avatars of War. Espero que os guste!!!
FINISHED!!!
Here I show you the last images of the Dwarf Lord of Avatars of War. I hope you like it!!!
Aquí os muestro las imágenes finales del Señor Enano de Avatars of War. Espero que os guste!!!
FINISHED!!!
Here I show you the last images of the Dwarf Lord of Avatars of War. I hope you like it!!!
viernes, 7 de marzo de 2014
WIP Señor Enano / Dwarf Lord 5/6
Empezamos con los detalles de la miniatura, que tiene y muchos!! Hoy toca ponernos con las gemas y empezar la parte superior de la capa (pelaje):
We begin with the details of the miniature (it has and it has a lot!!) Today we get into gems and begin with the top part of the cloak (fur):

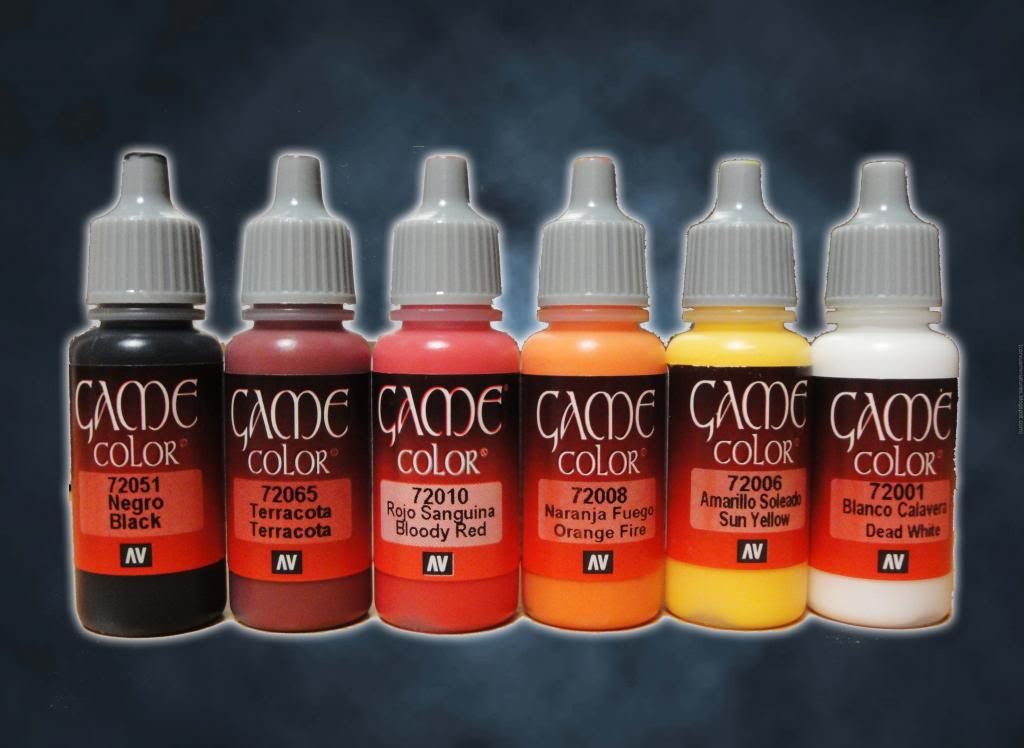
Colores para la gema roja:
Colours for the red gem:

Sombras 1: Terracota
Luces 2: Amarillo Solar
Sombras 2: Terracota + Negro
Luces 3: Blanco Hueso
Basecoat: Bloddy Red
Lights 1: Orange Fire
Shadows 1: Terracota
Lights 2: Sun Yellow
Shadows 2: Terracota + Black
Lights 3: Dead White
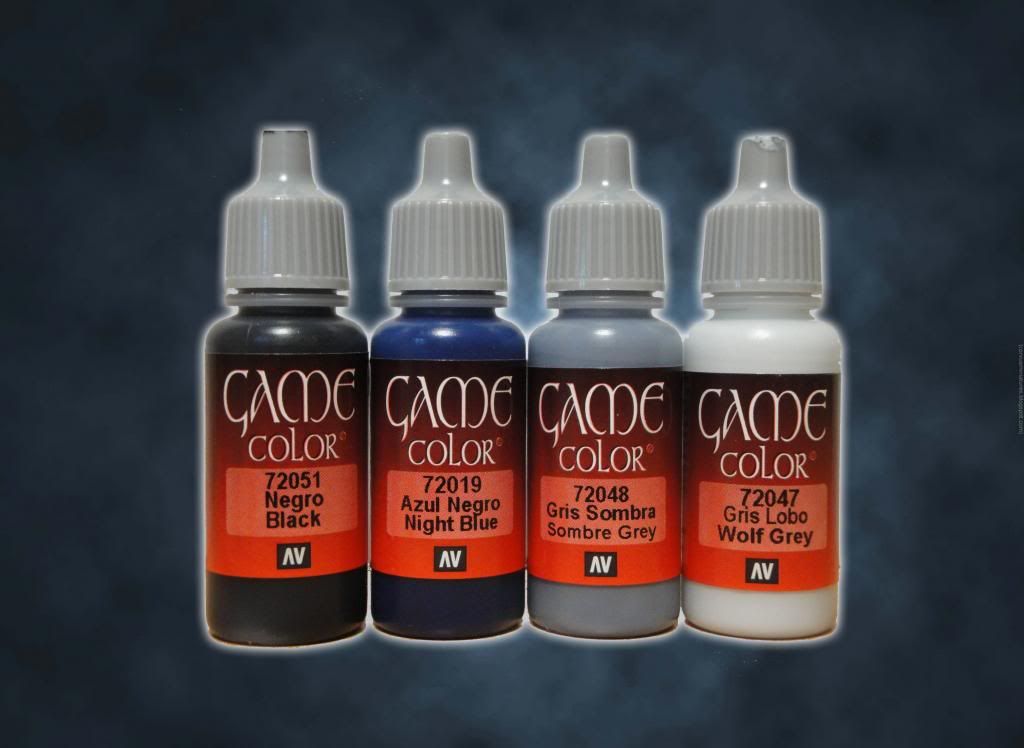
Colores para la gema azul:
Colours for the blue gem:

Capa base: Azul Mágico
Sombras 1: Azul Imperial
Luces 1: Azul Eléctrico
Sombras 2: Azul Imperial + Negro
Luces 2: Gris Lobo
Basecoat: Magic Blue
Shadows 1: Imperial Blue
Lights 1: Electric Blue
Shadows 2: Imperial Blue + Black
Lights 2: Wolf Grey
Colores para el pelaje superior de la capa:
Colours for the fur (cloak's top):
We begin with the details of the miniature (it has and it has a lot!!) Today we get into gems and begin with the top part of the cloak (fur):
Colores para la gema roja:
Colours for the red gem:
Capa
base: Rojo Sanguina
Luces
1: Naranja FuegoSombras 1: Terracota
Luces 2: Amarillo Solar
Sombras 2: Terracota + Negro
Luces 3: Blanco Hueso
Lights 1: Orange Fire
Shadows 1: Terracota
Lights 2: Sun Yellow
Shadows 2: Terracota + Black
Lights 3: Dead White
Colores para la gema azul:
Colours for the blue gem:
Capa base: Azul Mágico
Sombras 1: Azul Imperial
Luces 1: Azul Eléctrico
Sombras 2: Azul Imperial + Negro
Luces 2: Gris Lobo
Basecoat: Magic Blue
Shadows 1: Imperial Blue
Lights 1: Electric Blue
Shadows 2: Imperial Blue + Black
Lights 2: Wolf Grey
Colours for the fur (cloak's top):
miércoles, 5 de marzo de 2014
WIP Señor Enano / Dwarf Lord 4/6
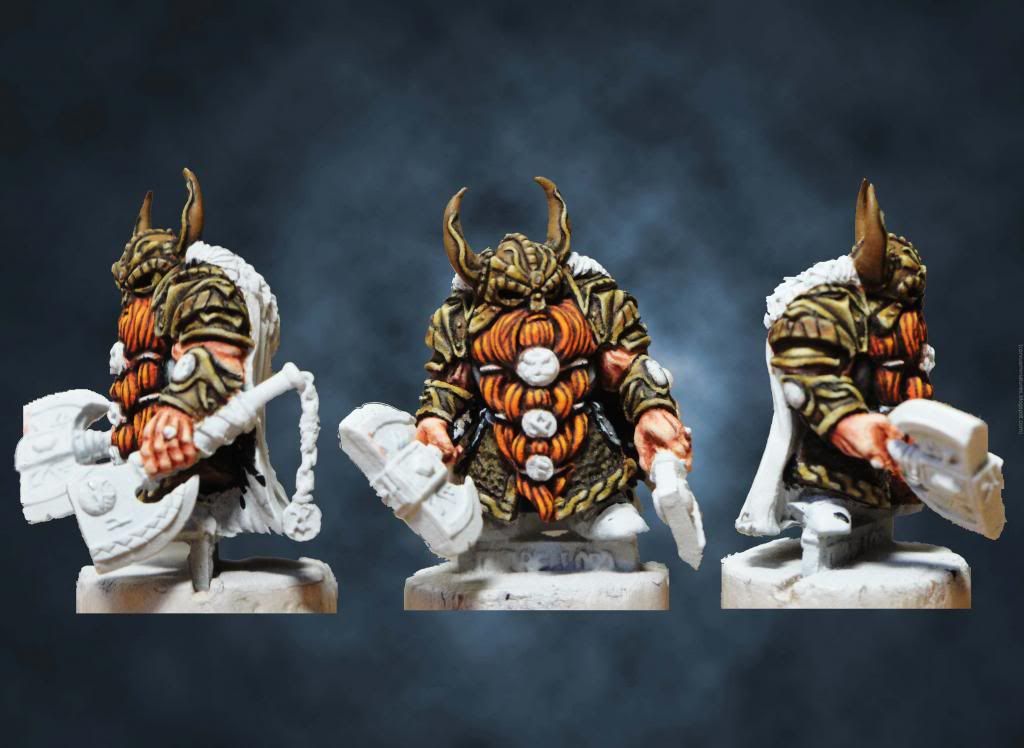
Seguimos con una pequeña actualización del Señor Enano: metálicos y mango de las armas.
We continue with a small update of the Dwarf Lord: metal and weapons handle.
Para pintar los metálicos, he utilizado la técnica del NMM (Non Metallic Metal) que consiste en intentar representar zonas metálicas utilizando para ello colores no metálicos (colores planos, sin brillo ni partículas metálicas). Es una técnica de la cual dedicaré un artículo exclusivo en el futuro pero, en resumen, requiere más paciencia de la habitual y su eficacia reside en obtener un gran contraste entre la luz más extrema (idealmente blanca) y la sombra más extrema (idealmente negro).
Capa Base: Gris Frío
Sombras 1: Gris Frío + Negro
Luces 1: Gris Frío + Gris Muralla
Sombras 2: Negro
Luces 2: Gris Muralla
Luces 3: Gris Fantasma
To paint metal, I've used NMM (Non Metallic Metal) techinique, that consist in trying to paint metal parts using non metallic colours (plain colours, without neither glossiness nor metallic particles). This is a technique that I will throw an exclusive article in the future but, in short, required more patience than usual and its efficiency is hidden in obtaining a huge contrast between most extreme light (ideally white) and most extreme shadow (ideally black).
Basecoat: Cold Grey
Shadows 1: Cold Grey + Black
Lights 1: Cold Grey + Stonewall Grey
Shadows 2: Black
Lights 2: Stonewall Grey
Lights 3: Ghost Grey
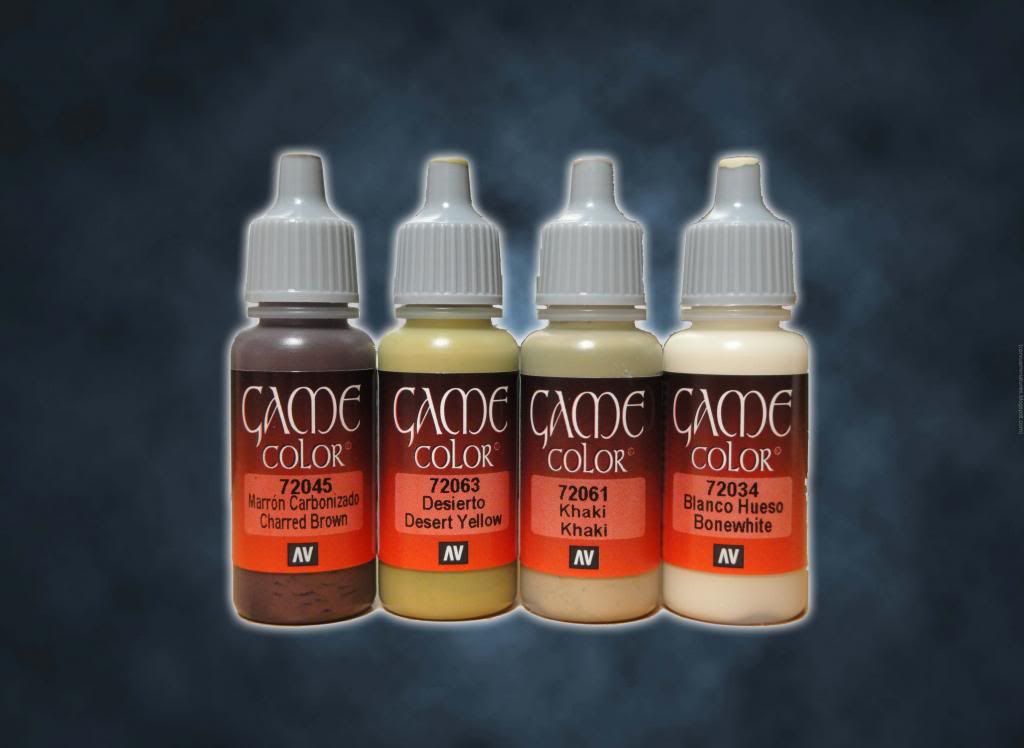
Capa base: Desierto
Sombras 1: Marrón Carbonizado
Luces 1: Khaki
Luces 2: Blanco Hueso
Basecoat: Desert Yellow
Shadows 1: Charred Brown
Lights 1: Khaki
Lights 2: Bonewhite
We continue with a small update of the Dwarf Lord: metal and weapons handle.
Para pintar los metálicos, he utilizado la técnica del NMM (Non Metallic Metal) que consiste en intentar representar zonas metálicas utilizando para ello colores no metálicos (colores planos, sin brillo ni partículas metálicas). Es una técnica de la cual dedicaré un artículo exclusivo en el futuro pero, en resumen, requiere más paciencia de la habitual y su eficacia reside en obtener un gran contraste entre la luz más extrema (idealmente blanca) y la sombra más extrema (idealmente negro).
Capa Base: Gris Frío
Sombras 1: Gris Frío + Negro
Luces 1: Gris Frío + Gris Muralla
Sombras 2: Negro
Luces 2: Gris Muralla
Luces 3: Gris Fantasma
To paint metal, I've used NMM (Non Metallic Metal) techinique, that consist in trying to paint metal parts using non metallic colours (plain colours, without neither glossiness nor metallic particles). This is a technique that I will throw an exclusive article in the future but, in short, required more patience than usual and its efficiency is hidden in obtaining a huge contrast between most extreme light (ideally white) and most extreme shadow (ideally black).
Basecoat: Cold Grey
Shadows 1: Cold Grey + Black
Lights 1: Cold Grey + Stonewall Grey
Shadows 2: Black
Lights 2: Stonewall Grey
Lights 3: Ghost Grey
Y el mango de las hachas:
And the axe handle:
And the axe handle:
Capa base: Desierto
Sombras 1: Marrón Carbonizado
Luces 1: Khaki
Luces 2: Blanco Hueso
Basecoat: Desert Yellow
Shadows 1: Charred Brown
Lights 1: Khaki
Lights 2: Bonewhite
martes, 4 de marzo de 2014
WIP Señor Enano / Dwarf Lord 3/6
Volvemos a la carga con este WIP, esta vez, con la barba:
We carry on with this WIP, this time, with the beard:

Como siempre, los colores utilizados para la barba:
As always, the colours used for the beard:

Para obtener un resultado vistoso, hay que dedicarle paciencia a esta etapa y pintar cada mechón de pelo individualmente (¡¡¡nada de pincel seco!!!):
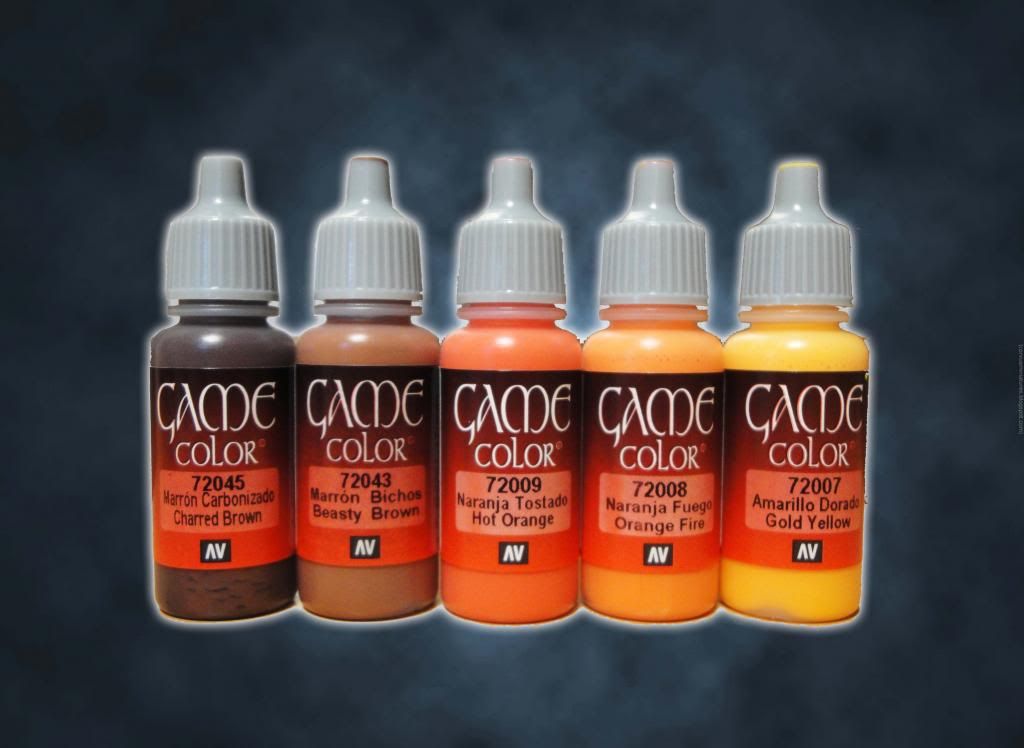
Capa base: Naranja Tostado
Sombras 1: Marrón Bichos
Luces 1: Naranja Fuego
Sombras 2: Marrón Carbonizado
Luces 3: Amarillo Dorado
To obtain a gorgeous result, you must have patience with this step and paint each lock of hair individually (nothing like dry brush!!!):
Basecoat: Hot Orange
Shadows 1: Beasty Brown
Lights 1: Hot Fire
Shadows 2: Charred Brown
Lights 3: Gold Yellow
We carry on with this WIP, this time, with the beard:
Como siempre, los colores utilizados para la barba:
As always, the colours used for the beard:
Para obtener un resultado vistoso, hay que dedicarle paciencia a esta etapa y pintar cada mechón de pelo individualmente (¡¡¡nada de pincel seco!!!):
Capa base: Naranja Tostado
Sombras 1: Marrón Bichos
Luces 1: Naranja Fuego
Sombras 2: Marrón Carbonizado
Luces 3: Amarillo Dorado
To obtain a gorgeous result, you must have patience with this step and paint each lock of hair individually (nothing like dry brush!!!):
Basecoat: Hot Orange
Shadows 1: Beasty Brown
Lights 1: Hot Fire
Shadows 2: Charred Brown
Lights 3: Gold Yellow
Suscribirse a:
Entradas (Atom)